Image Galleries
Imagine that you have just walked into an art gallery. The pieces of art hang on well-lit expanses of white wall. There’s ample spacing between the works, so that each has its own presence without any distraction from those adjacent. The rooms are very spacious and it’s easy to find your way around the building. As you wander from room to room, you notice that within each of these rooms the works of art relate to each other. You know that, behind the scenes, a curator has put a lot of thought into the experience you have in this gallery while viewing the art.
A gallery web site should be conceptually similar to a real-life gallery such as this. You want to provide a clean, flexible space for your images to be displayed, with a corresponding sense of order and cohesion.
Creating an Image PageThe web page that displays your photograph, along with a title and possibly a description, is the equivalent of the expansive, blank walls in a real-life gallery. Let’s walk together through a basic example of how to create an image’s page. We’ll create the markup; add some style for the typography and colors of the images’ titles and descriptions; style frames, margins, and layout; and provide the placement of the navigational thumbnails.
Building a Basic ExampleAs always, our image’s page requires that we use well-structured markup:
This example is fairly basic:
- The h1 is acting as a title and a breadcrumb, in an effort to keep things really simple.
- The set name and image name are emphasized.
- The image is wrapped in a paragraph—which will make it easier to position and style—and links to a full-sized version. A class of photo is given to this paragraph for styling purposes.
- The description is a paragraph with a class of description.
- The photo, header, and description is wrapped in a div with an id of content for styling. Each image is no wider than 500px.
For your own implementation, the links’ href values will need to be changed from # to their proper values. Our resulting page is shown in Figure behind :

Adding Typography and Colors Let’s add some basic styles to our style sheet for the page’s typography and colors, which will produce the result shown in Figure behind :
The colors and typefaces you choose should work well with the style of imagery you’re using. White is a great color for galleries because it’s the most neutral color to work with, especially for a large variety of images, or for images that are changed frequently. On the downside, this means that you’ll see the use of white everywhere on gallery sites, so you may want to think outside the square if uniqueness is a priority. I’ve seen some photo gallery web sites that use black or gray for their pages, and they look wonderful, but do be careful about crazier colors. Remember that the page colors you choose can really affect the mood of your images, and that rules of clean design should still apply. It’s best to keep all design elements minimal: the visual focus of a gallery should be on the images.
I’ve chosen to use Times New Roman as it’s clean and sophisticated without being a distraction from the images. Although sans serif typefaces are easier to read on-screen, our gallery uses very little text so the use of serif fonts won’t be a problem.
Next, we style the h1, paragraphs (p) and unordered lists (ul) :

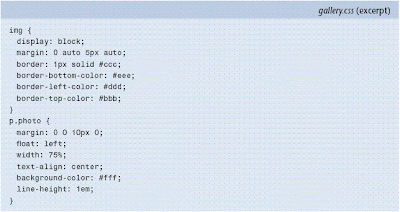
To display galery.css show in figure 1. below :
 Figure 1. Page showing basic styles


